Image Map

2.27.2019

Birdie Wreath with Laura

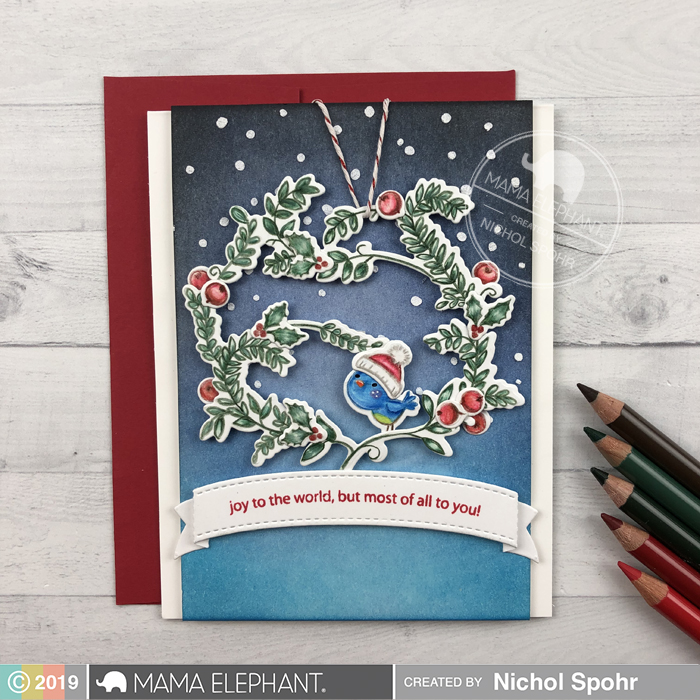
Hi there! Laura here and today I have a project to share featuring the adorable new Birdie Wreath set.

Mama Elephant-Birdie Wreath & Hippity Hop
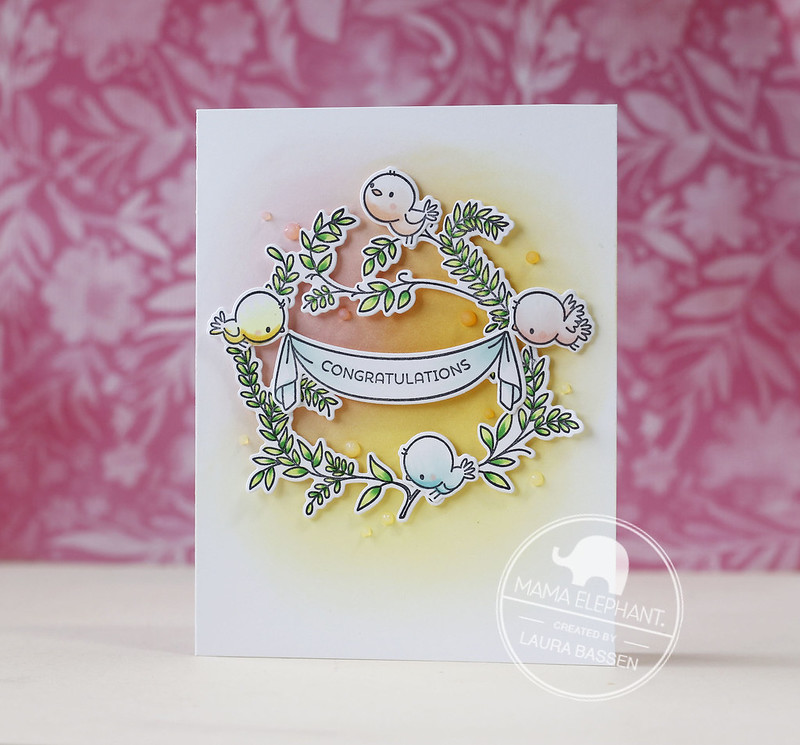
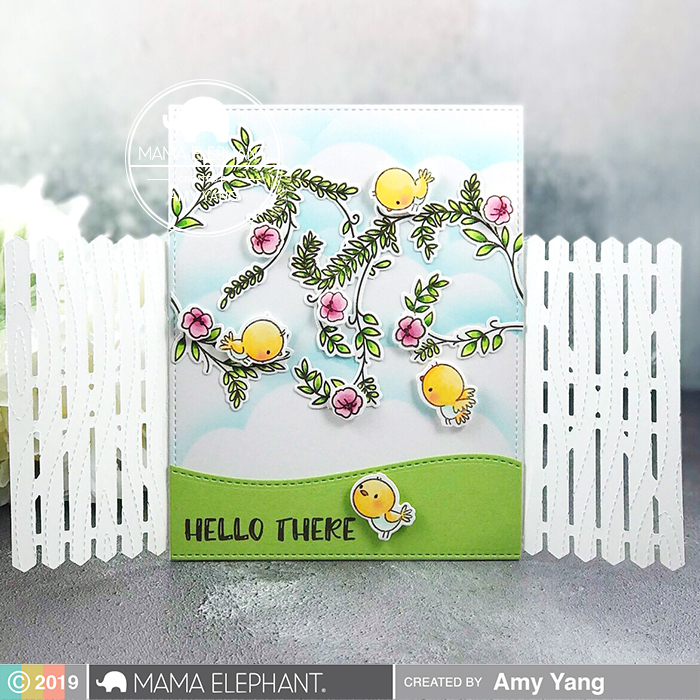
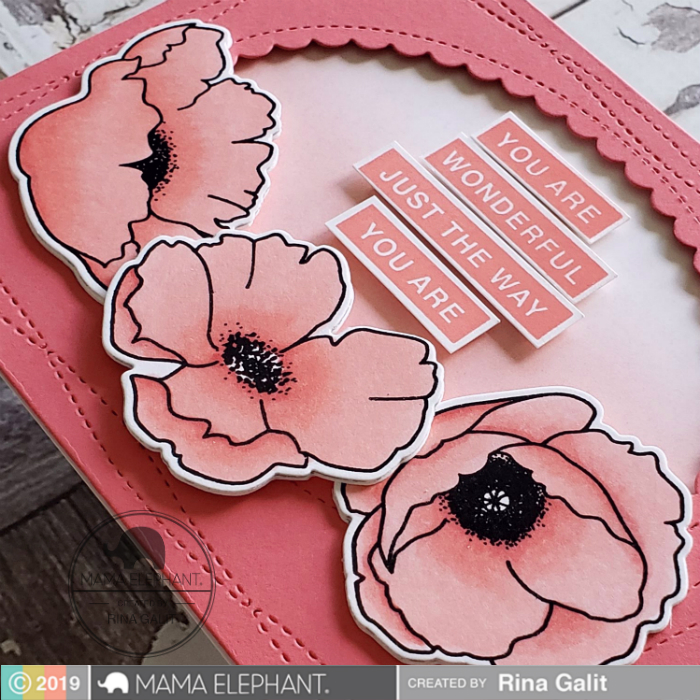
To begin I stamped several of the images from Birdie Wreath as well as the banner image from Hippity Hop and colored them with Copics. Then I used the coordinating creative cuts to die them out.

Mama Elephant-Birdie Wreath & Hippity Hop
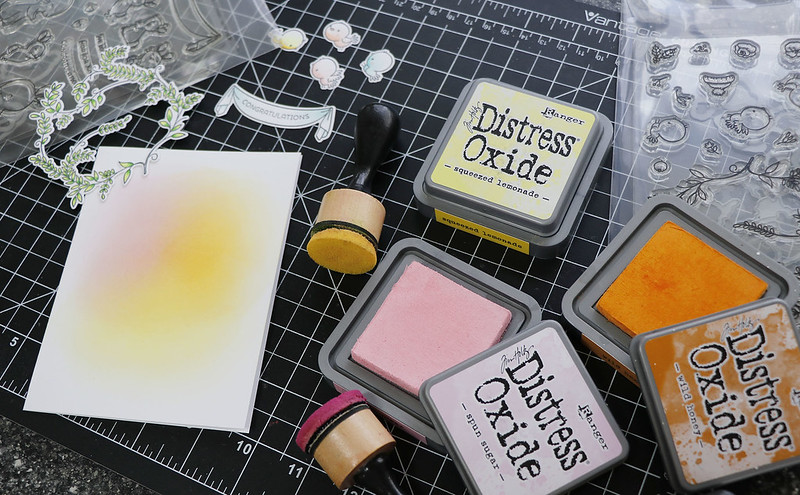
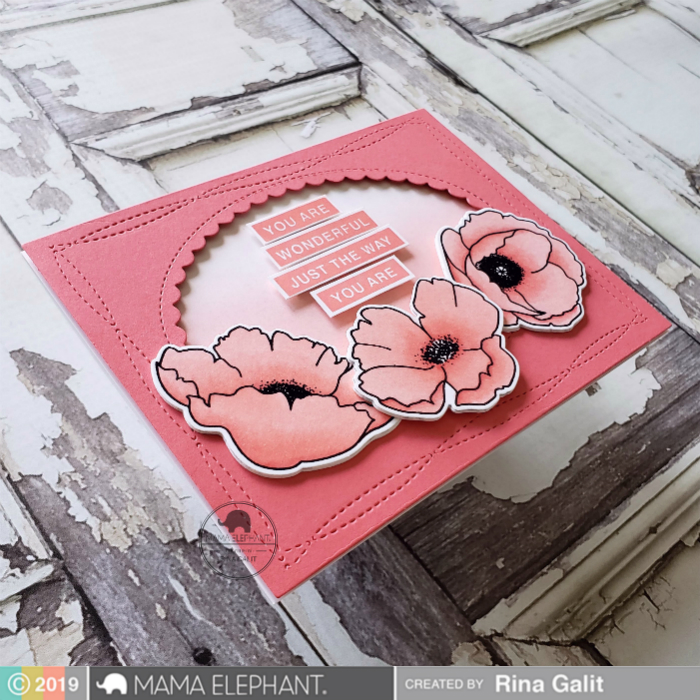
For the background I blended Distress Oxides in Spun Sugar, Wild Honey & Squeezed Lemonade. Then I used foam tape to pop up the images over the in blended background.

Mama Elephant-Birdie Wreath & Hippity Hop
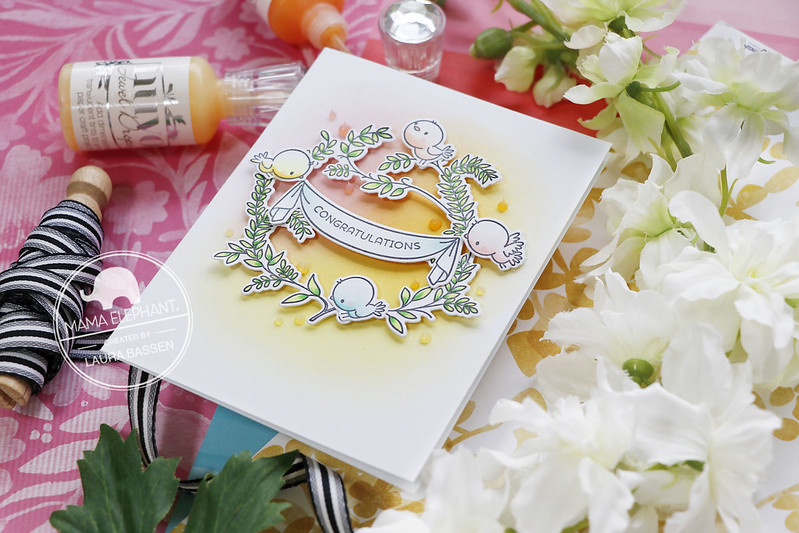
I added some Nuvo Jewel Drops in Rose Water, Orange Marmalade & Limoncello here and there for accents.

Mama Elephant-Birdie Wreath & Hippity Hop
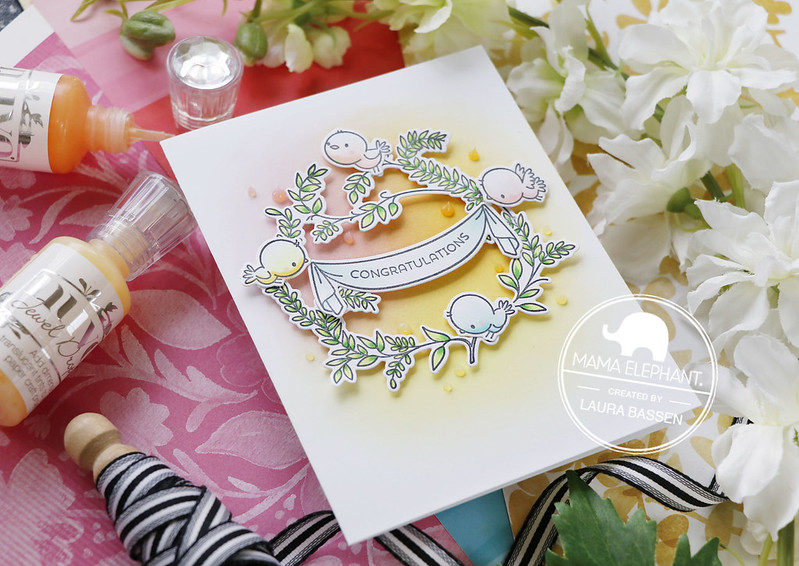
I think this would make a perfect wedding or even baby card. Hope you have a wonderful day! Thanks so much for stopping by!

2.25.2019

Little Chickie Agenda with Nichol

Hello friends! Nichol here with a Designer Series project featuring the Favor Bag Chickie and Little Chickie Agenda stamps and dies combined to create these adorable springtime scene cards! In addition to the new chickie products I used the brand new Oval Scallop Frames to create the cracked "eggs" too! Zig Clean Color Real Brush Markers were used for the no-line coloring of the chickies. With so many cute products I couldn't stop at just one card and have three to share with you today!
To watch the creation of these die cut scene cards from start to finish, click HERE or watch below:


I started by creating the backgrounds for all three scene cards with a clouds stencil and Peacock Feathers Distress Ink. A Grassy Trio Border was die cut from green cardstock, the edges inked with Mowed Lawn Distress Ink and adhered along the bottom edge of each cloud background. Sentiments from the Hello Friend Wishes Stamp Set were stamped along the bottom edge of each design with clear embossing ink and heat embossed with white embossing powder. I love how the bright white sentiments stand out against the green cardstock!

ME_DesignerSeries_Chickie1

Chickies were die cut from light yellow, orange, ivory, black, and red cardstock using the Favor Bag Add On Chickie Dies. The chickie was inked with Mustard Seed Distress Ink and pink cheeks were created with Spun Sugar Distress Ink and a sponge dauber. The wings for each chickie were inked with Spiced Marmalade Distress Ink. Each chickie was assembled and adhered to the design as shown. Their are multiple ways to put together the Chickie (and all Favor Bag Add Ons) for many design possibilities!

Eggs were die cut from teal cardstock using the Oval Scallop Frames Dies. I love that you can create die cut ovals and even cracked eggs! I used the zig zag die to make cracked eggs for my cards. The edges were inked with Peacock Feathers Distress Ink and splattered with Picket Fence Distress Paint for speckled eggs.

ME_DesignerSeries_Chickie1

The Little Chickie Agenda images were stamped on Bristol Smooth Cardstock with Antique Linen Distress Ink and colored in with Zig Clean Color Real Brush Markers. The color combinations are listed below:
  • Chickie: 052 Bright Yellow, 050 Yellow, 055 Pale Yellow, 201 Pink Haze, 065 Mid Brown
  • Eggs: 036 Light Blue, 302 Haze Blue
  • Paint & Paint Cans: 031 Cobalt Blue, 036 Light Blue, 090 Gray, 097 Pale Gray
  • Paintbrush: 065 Mid Brown, 072 Beige, 090 Gray, 097 Pale Gray, 031 Cobalt Blue, 036 Light Blue
The Little Chickie Agenda images were die cut using the coordinating Little Chickie Agenda Dies and eyes were added with a black glaze pen. The images were adhered to the design as shown.

ME_DesignerSeries_Chickie1

Bows were die cut from bright pink cardstock using the Dainty Bow Die, assembled and added to the die cut Chickies on two of the cards. A heart from the Pocket Envelope Die Collection was die cut from red cardstock and adhered under the sentiment on one of the cards.

ME_DesignerSeries_Chickie1

The cards were finished by adding Glossy Accents to the eyes and beaks of the Chickies. White dots were added to the cheeks of the die cut and stamped chickies. Once the Glossy Accents dries, white highlights were added to the eyes and beaks.

ME_DesignerSeries_Chickie1
Mama Elephant Supplies used for this project:

2.22.2019

STAMP HIGHLIGHT : POPPY FLOWERS

Welcome back for day 4 of our Stamp Highlights! Today we are looking at the beautiful flowers in the new  Poppy Flowers set. The Design Team made wonderful flower arrangements!


 Amy made a beautiful jar shaped shakercard using the Jar Shaker Creative Cuts and the Poppy Flowers set.


Keeway's gold embossed poppies adds a beautiful elegant touch. She paired the Poppy Flowers against a background die cut with the Hillside Cover CC, paired with a sentiment from Pretty Lovely.


 Laura also combined the Jar Shaker-Creative Cuts with the Poppy Flowers to make this fun, modern card.


Nichol paired this lovely grouping of watercolored poppies with sentiments from the Scripty Notes and Hello Friend Wishes stamp sets.


We love this beautiful shaker card Thi made with Poppy Flowers and Jar Shaker CC.

2.21.2019

STAMP HIGHLIGHTS : BIRDIE WREATH

Hello All! Today we continue with the new Birdie Wreath illustrated by Aida Zamora for today's Stamp Highlight! We just adore these whimsy birds with this sweet wreath!


Nichol loves the versatility of the new Birdie Wreath Stamp Set and used the winter and holiday images from the set to make a holiday wreath scene with a bird all decked out with a stocking cap! The new 3D Arch Banner is the perfect place to add a sentiment under the wreath.Back to top


Thi paired Birdie Wreath with Gate X Fence CC perfectly! 


In this adorable card, Amy combined the Birdie Wreath set with the 3D Arch Banner and the Framed Tags - Waverly Creative Cuts.


We love how Amy creatively rearranged the wreath and added the Gatefold X Fence - Creative Cuts in this sweet card.

2.19.2019

STAMP HIGHLIGHTS: Little Fairy Agenda

We are highlighting the super itty bitty, cutie pie little fairies from Little Fairy Agenda.  Due to their sheer itty-bitty-ness, they are even cuter in person! The fairies are perfect for all upcoming Spring projects. We love what the Design Team did with the fairies

Amy's oval-shaped card is so adorable! She combined the Little Fairy Agenda with the Wild Meadow and the Oval Scallop Frames - creative cuts. 


Nichol wow us with this see-thru jar shaker filled with lots of sparkles is the perfect focal point for the little fairies in the garden! 


Thi made this super sweet scene by pairing Little Fairy Agenda with Cloud Nine CC.


Keeway shared tons of happiness in this card with rainbows and little fairies! She used the Little Fairy Agenda and a sentiment from Tandem Extras to create this fun card. 


 Laura used the Basic Rectangles and Smile Script-Creative Cuts to create her sweet card.


Such sweet little cards from our team! Hope you loved them too!

2.18.2019

STAMP HIGHLIGHT: Little Chickie Agenda

Happy Monday! Today we are highlighting a few projects by our Design Team with the new February products. Today is all about the chicks. Lots and lots of chicks with Little Chickie Agenda!


Want to swoop up some cute little chickies into a jar to take home? Keeway created an adorable picture in picture style scene with a chickie shaker jar! She used the Little Chickie Agenda, Jar Shaker CC, Picket Fence CC, and Landscape Trio CC to make this imaginative scene. Beautiful scene by Keeway Tsao!


We simply adore how Thi paired Little Chickie Agenda with the Circlular Grid CC. And how cute is that matching tote bag featuring FBA Chick?! Check out this favor bags and card combo of chicks by Thi Lam.


We love how Amy combined the Little Chickie Agenda, the FBA Chickie Creative Cuts, and the Cloudy Day Cover Creative Cuts to make this cute card. Check out this super cute card by Amy Yang


These Little Chickie Agenda cuties are celebrating a birthday with this interactive Wiper Surprise card. The chickie with the megaphone pops up when the card is opened! Watch the video by Nichol HERE.


Laura used the Gatefold X Fence & Circular Grid-Creative Cuts to make this sweet card along with sentiments from Everyday Greetings & Hello Friend Wishes.


2.15.2019

February Design Team Stampede!


Welcome to the Mama Elephant Design Team blog hop!

Our newest release is now live and available for purchase in the store!

www.mamaelephant.com

We love, Rina's projects for today's Stampede. That beautiful coral cardstock really makes the chickies pop! Rina used the zig zag edge from the new Oval Scallop Frames to create the eggs! Genius way to really maximize the circles from Circular Grid!

ME supplies used: Little Chickie Agenda (stamps and dies), Oval Scallop Frames (dies), Cloud Nine (dies), Lots of Hearts (dies), Circular Grid (dies), Tea With Friends (stamps)


To celebrate the new release, Mama Elephant is picking 3 winners to win their choice of stamp set! Winners will be chosen at random from the collective blogs in the Stampede. You have up to 4 chances to qualify to win!

» 1. Leave a comment on this blog post «
» 2. Like/share us on Facebook: facebook.com/mamaelephant «
» 3. Follow/tweet us on Twitter: twitter.com/heymamaelephant «
» 4. Follow/tweet us on Instagram: instagram.com/mamaelephant «


Each action qualifies for one entry, max 4 entries per stampeder please!

Now let's get on with the Stampede with our designers!

 Keeway Tsao | Laura Bassen | Nichol Spohr | Thi Lam | Amy Yang


2.14.2019

February Release Review

Hope everyone is having a lovely night! We have so much love for these new products that are being release tonight at midnight! (EST) 4 new stamp sets and 9 new fun creative cuts! Remember to join us and our Design Team as we Stampede along some fun projects!


INTRODUCING: Poppy Flowers, Oval Scallop Frames CC

We love our cute critters here at Mama Elephant, but we also have a thing for flowers! New this month are these large sized poppy blooms. I opted to give them an organic free feel and love how they turned out! These are great to color and try your hand at artistic watercoloring!


We've also got Oval Scallop Frames coming at ya this month! The 3 largest frames have either the outer or inner stitched scallop details that really add a touch of femininity to the frames! And that smallest oval can be an egg complete with a zig zag for you to create a crack line! This makes for one super fun and exciting die set that can be used in so many ways!


Check out Rina's gorgeous coloring in her project today! She uses the Oval Scallop Frame perfectly to frame her flowers!

ME supplies used: Poppy Flowers (stamps and dies available 2/15/2019), Oval Scallop Frames (dies available 2/15/2019), Cloud Nine (dies)


Wow, we made it! We're not done yet! Rina will be back for tomorrow's Stampede with another great project along with the rest of our Design Team! Remember, the release goes live tonight at 12AM EST! Thanks again for joining us all week!