4.30.2014

Watercoloring and a Super Early Sneak Peek

Hey folks, I have a fun little water colored card today. So, a little back story... I was fortunate enough to attend a prestigious school in NYC that opened the doors to many different fields of art. We had the opportunity to take all these different classes... really great experience. I'll be honest and tell you that the water coloring class was one of my least favorites! I was so bad at it, lol! But now, fast forward some years, and heavily influenced by the crafting community I'm starting to embrace it. I think with anything, it's wise to invest in high quality materials. Though watercoloring have never been my thing, it didn't stop me from purchasing tons and tons of watercoloring supplies over the years. You name it, tubes, pencils, crayons, palettes, I've tried them all. I have used it in many projects the last few years when I was designing for other companies. My latest purchase has changed my mind about watercoloring... and it almost makes me semi good at it! LOL!

Here's a little step by step of my project today, I used this Butterfly Punch die set from Lifestyle Crafts.. it makes cutting out multiple butterflies so quick and easy. You can purchase the die set along with anything from the www.shopwer.com store for 20% off using my personal discount code SUGAR

First step is prepping these perfect butterflies. One pass through my Evolution die cut machine and I'm done.


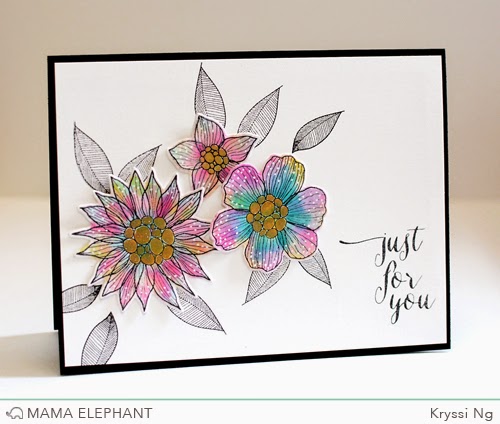
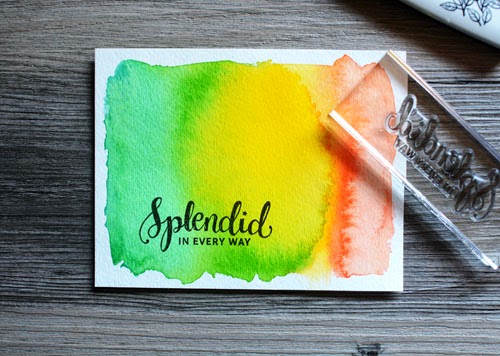
I did a light wash of water over my water color paper which was trimmed to a standard A2 size. Then I just applied just a bit of color one color at a time.


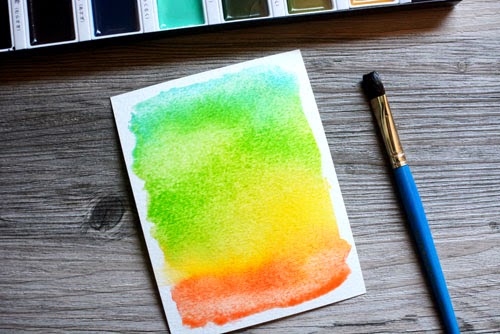
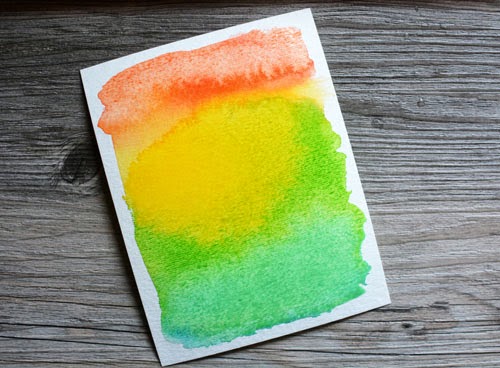
I over did the yellow a bit, wanted it to be bright, happy, and vibrant!


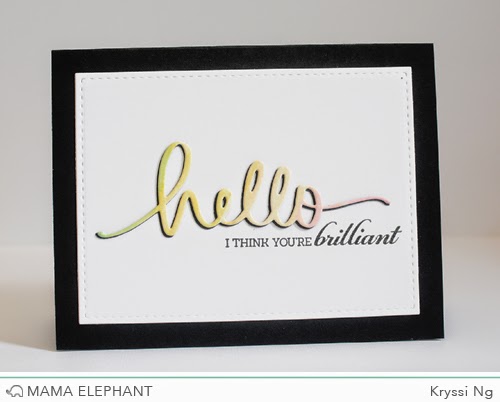
I stamped my sentiment using a brand-new-to-be-released-May-15th stamp set. If you loved Make a Wish, you will love this set as well!


Let's attach the butterflies. Fold the wings outward for a 3d effect.


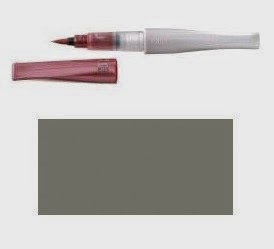
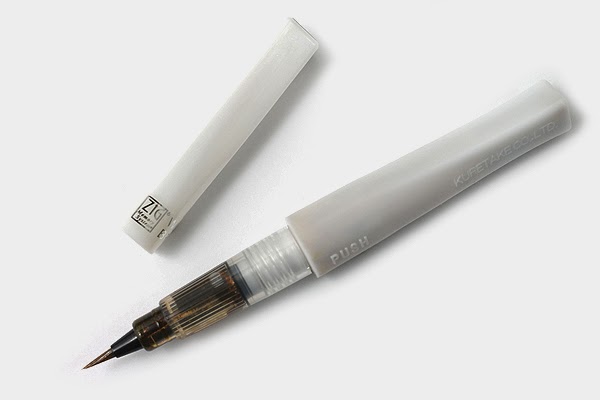
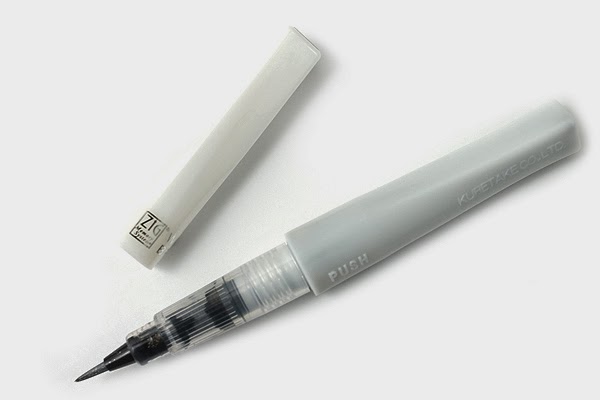
Add some sparkle with the Wink of Stella Clear Glitter brush pen.


Trim the panel in a diagonal... no die cut needed for this, as it's just cutting one side at a slant and then cutting the other side at 90 degrees.


Done and done!

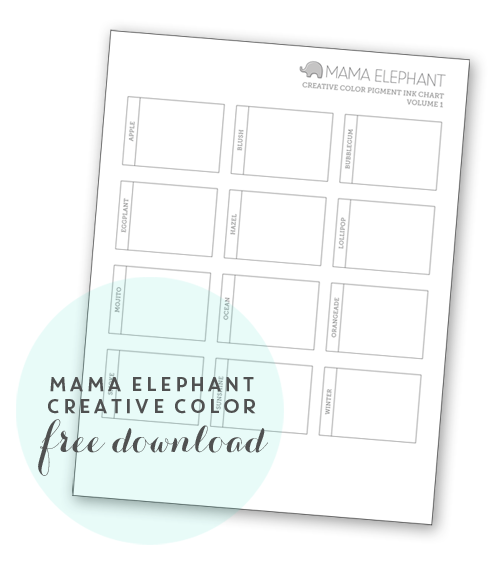
We are considering stocking the Gansai watercolors I used in our store. If you are interested, please leave a comment.

Just a reminder, our current challenge ends May 5th. Hurry and get your entries in. The prize is a spot on our Challenge Design Team!

4.29.2014

DS: Nichol Magouirk: Hello Script CC and Friends

Hello, hello!
Nichol here today with a new card share showcasing the brand new Hello Script Creative Cuts Die. I didn't want the Hello die to be lonely so I gave him some accessorized stamped and die cut critter friends using the Pandamonium Stamp Set and Pandamonium Creative Cuts, Just Hatched Stamp Set and Just Hatched Creative Cuts, Love Quotes Stamp Set and Love Quotes Creative Cuts and the Honey Bunny Stamp Set and Honey Bunny Creative Cuts!

They look like they're having a good time, don't they?!

  Nichol_HelloScriptDie_card


To give the Hello Script Creative Cuts Die dimension and to help it stand out better with all the "activity" around it, I glued five of these die cuts together for a more substantial presence that resembles a chipboard die cut!

Nichol_HelloScriptDie_closeup1

For the background of the design I first layered a piece of vellum over white cardstock and ran them through my die cut machine using the straight border from the Speech Trio Creative Cuts Collection.
Next, I ran just the white piece of cardstock through again, this time cutting the top with the scalloped Landscape Trio Creative Cuts die. I replaced the vellum over the white cardstock, applying adhesive under the other elements to "hide" it. Then I adhered the whole thing to my card front using foam adhesive.

All of the cute Mama Elephant stamp set critters are adorned with stamped and die cut accessories from the Honey Bunny Stamp Set and Honey Bunny Creative Cuts. I stamped an additional "hello" word bubble from the Everyday Greetings Stamp Set and die cut it using the word bubble from the Just Hatched Creative Cuts. Lastly, I added some confetti from glitter paper and cardstock using the Confetti Creative Cuts die.

Nichol_HelloscriptDie_closeup2

Thanks for spending some time here on the Mama Elephant Blog today!

See you soon with more stamped fun...

4.24.2014

DS: AMazing Watercoloring with Nichol Magouirk and Type It! (VIDEO)

Hello again stamping friends!

Nichol here with a couple of new cards created with the awesome new Type It Creative Cuts that coordinate perfectly with the Type It Stamp Set. I stamped the typewriters with Ranger Distress Inks and used water and a paintbrush to give them a "watercolored distress" look. I created a tone-on-tone texturized background using word dies from the Type It Creative Cuts by cutting a single word several times and applying them to a sheet of cardstock in a repetitive pattern.

Nichol_DesignerSeries_TypeItCards


I stamped and watercolored the Type It Stamp Set images on watercolor paper and made sure they were completely dry before cutting out with the coordinating Type It Creative Cuts. Using a paintbrush to apply water to the Distress Stamped images, allows for more "control" in distressing/watercoloring. 

Nichol_DesignerSeries_TypeIt_BlueCard

The texture in the background of the card gives interest without overwhelming the other elements of the design. By keeping the background all one color, it allows the vibrant "watercolored" accents to shine.

Nichol_DesignerSeries_TypeIt_closeup2

This same design could be used for all the sentiments in this stamp set! By simply switching up the colors, you could create an entire set of cards to give as a thoughtful handmade gift!

Nichol_DesignerSeries_TypeIt_PinkCard

The Confetti Creative Cuts die always gets a lot of love from me! I adore that I can make any color of confetti that I want with this versatile die!

Nichol_DesignerSeries_TypeIt_closeup1

I'm loving all the NEW Creative Cuts for the "older" stamp sets, aren't you?!!! I so appreciate you spending some of your day with me.

Wishing you all a very creative day!

4.23.2014

DS: Lights Out with Nichol

Hello! Nichol here today with a new card sharing featuring the new Lights Out Creative Cuts and Lights Out Stamp Set. Lights Out is one of my favorite Mama Elephant stamp sets and I'm so excited that there are coordinating dies now!

I paired the Lights Out Stamp Set and Lights Out Creative Cuts with the Pandamonium Stamp Set and coordinating Pandamonium Creative Cuts to make it look like the panda was "hanging" from the light bulb pull chain.

Nichol_DesignerSeries_LightsOutCard


 I used the Rock 'n' Roll technique to apply both the Sunshine Pigment Ink and Orangeade Pigment Ink to the lightbulb stamp before inking the paper. I used a gold Delicata Ink from Tsukineko to stamp the lightbulb filiment. For the light bulb base I stamped the image with Versamark Ink and used Ranger Super Fine Silver Embossing Powder to heat set the design. I used the same embossing powder for the light bulb pull chain.

Nichol_DesignerSeries_LightsOut_closeup3

To make the panda sparkle, I stamped him first with a black dye ink and then stamped over it again using Versamark Ink and heat set the design with Judikins Iridescent Sparkle Embossing Powder. I stamped and die cut the lantern and pole from Pandamonium Stamp Set and Pandamonium Creative Cuts to tuck "into" the panda's hand.

Nichol_DesignerSeries_LightsOut_closeup1

I stamped the greeting from the  Lights Out Stamp Set on the vellum die cut using the stitched rectangle from the Femme Frames Creative Cuts and carefully applied both white and yellow embossing powders to the sentiment to make the script words stand out! Some sequins die cut using the Confetti Creative Cuts finish the design.

Nichol_DesignerSeries_LightsOut_closeup2

Thanks for hanging out with me today!

4.21.2014

Simon Says Stamp + Mama Elephant Summer Garden Blog Hop

Hey folks, today the ME team is joining forces with Simon Says Stamp in celebration of our Summer Garden collaboration. We designed this exclusive to Simon Says Stamp set for their latest release. I would have to say this is the most feminine stamp set we have designed to date! It's filled with beautiful hand drawn florals perfect for Spring and the upcoming wedding season! And it has a matching die set!

Up for grabs is a $25 gift certificate that Simon Say Stamp is generously offering to one winner from all the comments left o the blog hop!


Here's the card I whipped up using the Summer Garden stamp and die set.


I went for a colorful tie-dye florals created with watercolors. The center of the florals were colored with my new Wink of Luna brush pens in Gold. So pretty! I finished off the card by coloring random white dot son the outer petals of the flowers to give it a bit more detail, totaling channeling my inner Nichol. ;)


Ready for more inspiration?

4.20.2014

An AMAZING Honey Bunny party by Elena Roussakis!

Hi, Elena here! I'm so excited to show you the party I crafted for my daughter, Sofia,  using images from "honey bunny."


My daughter's birthday is April 22nd, and it worked out perfectly to throw her an Easter bunny-themed party.


Creating cupcake toppers was so easy, using the new honey bunny creative cuts.


 I didn't really have a set color scheme for this party, but I kept everything in springtime colors and airy patterns and it came together nicely. What a relief, to be able to rummage through my huge stash of papers and actually use some of them up. hee.


I created dessert labels using the same papers as the cupcake wrappers. I gave my text a curve via the computer, and die-cut along the landscape die to fit around the text. It gives the label a much more custom look! Using washi tape to hold the die in place before running it through my Big Shot was a must.


Kryssi was sweet enough to send me higher resolution files for honey bunny so that I could incorporate the same bunny shape throughout the party.  I strung this one up inside of an empty Ikea frame, and used the files to create some photobooth props as well:


I hope you liked this crafty look at my party! I have extra pictures on my blog today, to show off the desserts a little bit more.  


♥.

4.16.2014

Creative Color Chart - Free Download

We received a customer request for a fillable ink chart for our Creative Color pigment ink pad line.


I promised I would get to it and so I'm fulfilling that promise today. :)

You can download the PDF chart HERE.


4.14.2014

April Soft Release Reveal!

Good evening! Our release will go live momentarily! Here's a recap of the new Creative Cuts as well as a few additions to The Shoppe!


We're now carrying a small quantity of these round blocks


Also new to The Shoppe! We only carry high quality products that I personally love and use frequently! We're pleased to add these amazing new pens from Zig that will surely add amazing details to your projects!


http://mamaelephant.com/products/zig-gold-metallic-wink-of-luna-brush


http://mamaelephant.com/products/zig-metallic-wink-of-luna-brush-silver


http://mamaelephant.com/products/zig-glitter-wink-of-stella-brush-gold


http://mamaelephant.com/products/zig-glitter-wink-of-stella-brush-silver


That's all! Release is now live! See you soon. :)

April Soft Release First Look

Hey everyone, welcome back! This month we have a soft release of 3 Creative Cuts designs. Why a soft release as supposed to a regular release? It's been pretty crazy here. Angela and I desperately needed some down time to recharge. We've been working nonstop around the clock. Most days, like right now, I'm drafting this post at 11:35 PM on a Sunday night. The disarray of my house and the pile of never ending laundry is proof that we needed to take back some of our time to dedicate to our family. We're also looking to bring in an extra hand to help out so that as business continues to pick up, we won't ever have to compromise quality in our products or customer service.

Same goes for our Design Team, we wanted to let everyone have a bit of a breather in between some releases. Also, since we have a new challenge happening right now, we wanted to give everyone time to create and really use their goodies before we jump into the next release. We hope to continue in this pattern for the rest of the year, 2 regular releases then a soft release.

Hopefully we'll all like this new schedule and I won't be so crazy all the time. :)

So the first Creative Cuts design I wanna introduce you to is called Hello Script. It's our first stand alone die that features my handwriting. We sized it perfectly to be the focus of a card and it's intricate enough to be elegant and chic!

In my first card I water colored a white mat and then die cut it, choosing to cut over the area where the color meets white space. You know I love my white space! I think it looks super pretty against a plain white cardbase. This is super easy and quick to whip up!


For my next card, I die cut my Hello Script on the full watercolored mat, check out the rainbow gradient. I also die cut it another time on black cardstock and then offset the watercolored Hello Script on top of the black Hello Script so the black looks like a shadow. The sentiment is from Lights Out.


Speaking of Lights Out, we are starting to introduce coordinating Creative Cuts to our previously released stamp sets. When we posted the question on Facebook, many of you wanted a coordinating die set for Lights Out! I love the images but the sentiments are some of my faves EVER.


My last card features the final Creative Cuts we're unveiling tonight and this one is AMAZING. Not only does it coordinate with Type It, but we've thrown in lots of fun elements like that scallop 3x4 frame perfect for your PL pages!! And a few words like 'xoxo' shown here! I made this card using our challenge as an inspiration. Psst! Have you played along yet? The prize is a spot on the Challenge Team!!


So, there you have it, 3 new Creative Cuts coming at you tonight!
Hello Script Creative Cuts
Lights Out Creative Cuts (coordinates with Light Out stamp set)
Type It Creative Cuts (coordinates with Type It stamp set)

Thanks for stopping by! :)


4.10.2025

Designer Series: More Pandas with Elena!

Hey there! Elena here, sharing a little set of pandamonium flat cards.


They all feature pandas, with something to say.


When you open the package, you find...


An assortment of flat, postcard-style cards.  The speech bubble leaves room for whatever you have to say. Because, sometimes you have the inside-of-a-card's-worth to write, but other times a quick hey! how've you been? is enough to brighten your friend's day.


I'm pretty sure this one is saying: go on and celebrate!

I mean, with the balloon and all...


I hope you like them!  Here's a supply list in case you'd like to whip up a batch of panda cards for yourself:

creative cuts: femme frames, honey bunny

♥.

4.07.2025

Designer Series: Up and Away with Emily Leiphart!


Hi, it's Emily here and today I'm showcasing the Up and Away Creative Cuts with coordinating Up and Away stamps. I used the partial die cutting technique to join the fox to the monkey. I created masks for stamping their hands together. If you look in the close-up, they are one piece. There are impression marks where they overlap but the colouring hides most of it. The bunny is a completely separate die cut adhered on top of the monkey's foot.


The bottom floral and vellum panels were created with the Landscape Trio Creative Cuts and the sentiment from Everyday Greetings was heat embossed onto the vellum with grapefruit embossing powder. I fussy cut a giant rose from one of the coordinating patterned papers and attached it to the monkey's hand.

Thanks so much for stopping by!

4.04.2025

Updates and a NEW Challenge!

Hi everyone! Just to let you know what's going on this month. We're having a soft release on the 15th, which consists of dies only. Be sure to keep an eye out on that! It's good stuff!

We're softening things up in the next few months... starting with THIS beautiful stamp and THIS die set we designed exclusively for our friends at Simon Says Stamp called Summer Garden available for purchase now! This is our second collab with Simon Says! The first set is HERE called Filled with Love.

Now for a fun announcement! There's a new addition to the ME Challenge Team. Please welcome Laurel Beard! She will be joining Lea Lawson, Lorraine Marasigan, and Alice Wertz. These fabulous ladies round out our Challenge Team... for now!

Sooo, speaking of which, that can only mean one thing! It's time for a new challenge! This one is a bit different as the prize is a spot on the ME Challenge Team for a 6 month term! The challenge will run all month, so you have lots of time to play along. I expect to see a ton of players, since you guys wiped out our entire release last month! I know many of you have ME stamps to play with!

Here's the inspiration photo, courtesy of www.raymondhom.com


Some rules to play along

1. You must use a Mama Elephant stamp
2. Include challenge graphic on your post and link back to this post
3. NEW creations only
4. Link up using the Inlinkz tool on the bottom

PRIZE: A SPOT ON THE ME CHALLENGE TEAM!!!

Challenge duration 4/4/2025 - 5/5/2025

And now the inspiration parade from our talented team, starting with Angela!

Stamps: Cosmic Stars, Make a Wish
Creative Cuts: Femme Frames


Stamps: Honey Bunny, True Friend

Stamps: Lovely Mums
Creative Cuts: Femme Frames, Bold Banner

Stamps: Everyday Greetings
Creative Cuts: Landscape Trio

Stamps: Lights Out
Creative Cuts: Femme Frames

Stamps: Origami, Smitten

Stamps: Honey Bunny, Everyday Greetings
Creative Cuts: Femme Frames, Landscape Trio

Stamps: Nursery Deco

Stamps: Just Hatched, Make a Wish, Pandamonium
Creative Cuts: Love Quotes
Stamps: True Friend

Are you game? Link up below!