Image Map

7.11.2018

Book Buddy with Nichol

Hello! Nichol here today with a set of Book Buddy pop up birthday cards and bookmarks! The new Book Buddy Creative Cuts Dies mix and match beautifully with the Inside Pop Bunny and Cat Dies. You guys, I love when we can mix and match our products and breathe new life into them. Even better than these two sets working seamlessly together? They pair perfectly with the Favor Bag Add On Creative Cuts Dies. I love this look and can't wait to share these cards with you.

MEDesignerSeries_BookBuddy_1

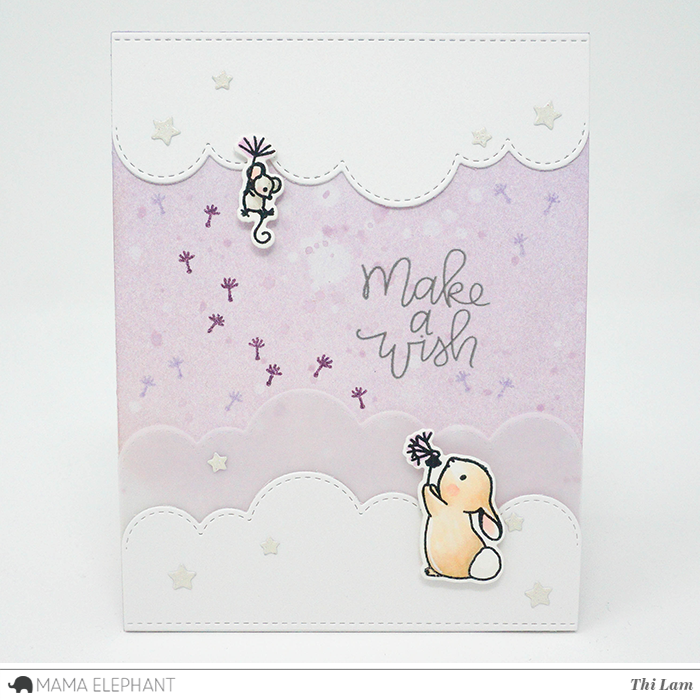
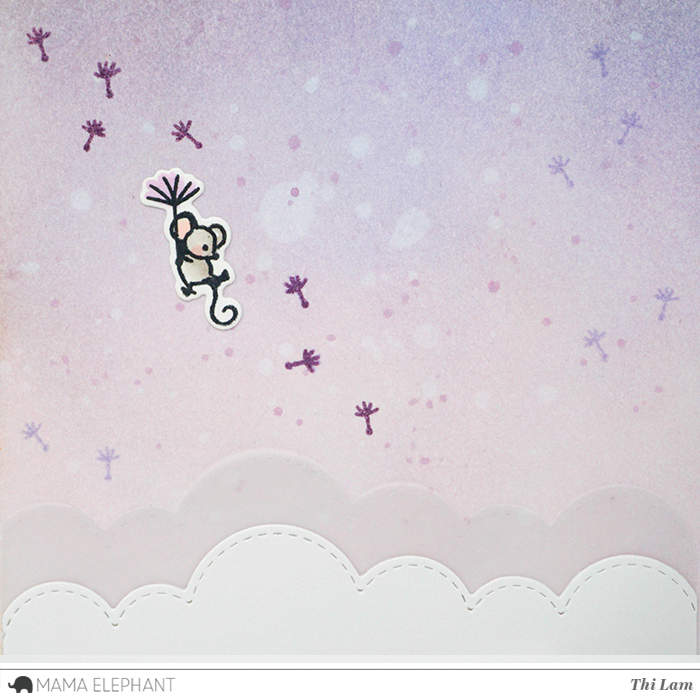
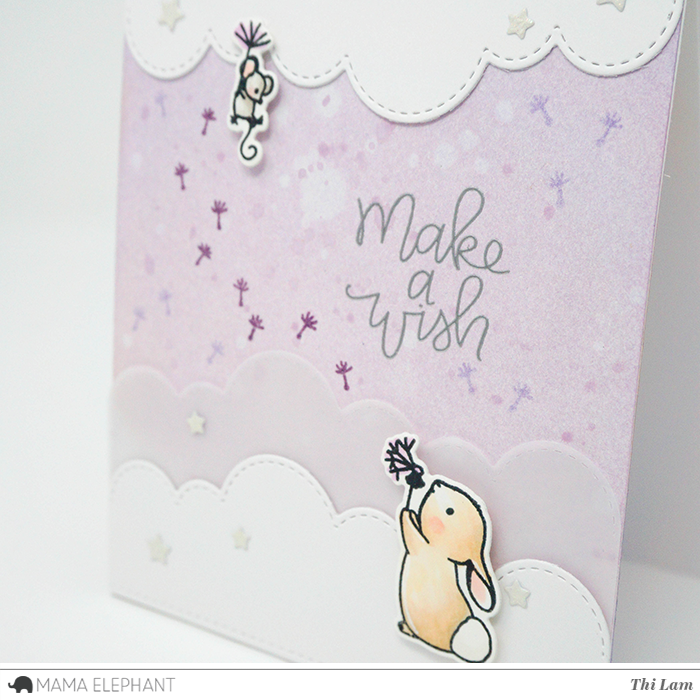
Let's start with the front of the three cards I'm sharing here today. The frames for each were die cut from Bristol Smooth Cardstock and die cut using the Framed Tags Hug It Out Creative Cuts Dies before being inked with two colors of Distress Oxide Ink colors, spritzed with water from a Distress Sprayer and blotted dry. The frame and inside panel were adhered to the front of white top fold card bases and adorned with a large Favor Bag Add On Dog, Bear, and Bunny peeking up from the bottom of each frame. All the components for each critter were die cut from cardstock, inked a bit and then glued in placed. Glossy Accents, a white gel pen, and Nuvo Crystal Drops in White Blizzard were used to embellish components of the design.

The word "hugs" from the Framed Tags Hug It Out Creative Cuts Dies was die cut from black mirror cardstock adhered to Fun Foam with Stick It Adhesive and place in the upper portion of each window.
I created custom cardstock "colors" by taking the Distress Ink pads and doing direct to paper. Once the ink was dry (I sped up the process with a heat tool), I stamped "happy birthday" from the Oh Happy Day Stamp Set using clear embossing ink, heat embossed with white embossing powder, and trimmed the sentiment into a thin strip before adhering to the card with foam adhesive.
Hearts were also die cut from the inked paper scraps using a Bookmark It Creative Cuts Die and glued in place before being embellished with Nuvo Crystal Drops in White Blizzard.

MEDesignerSeries_BookBuddy_2

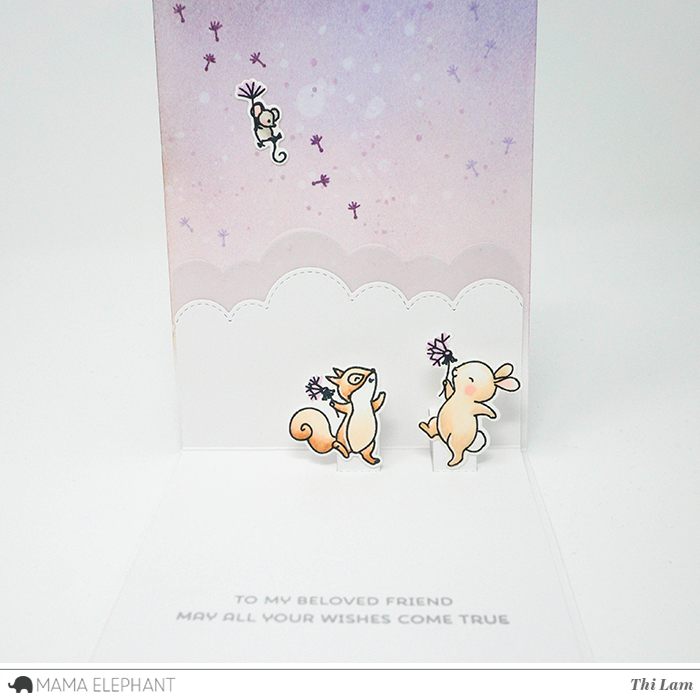
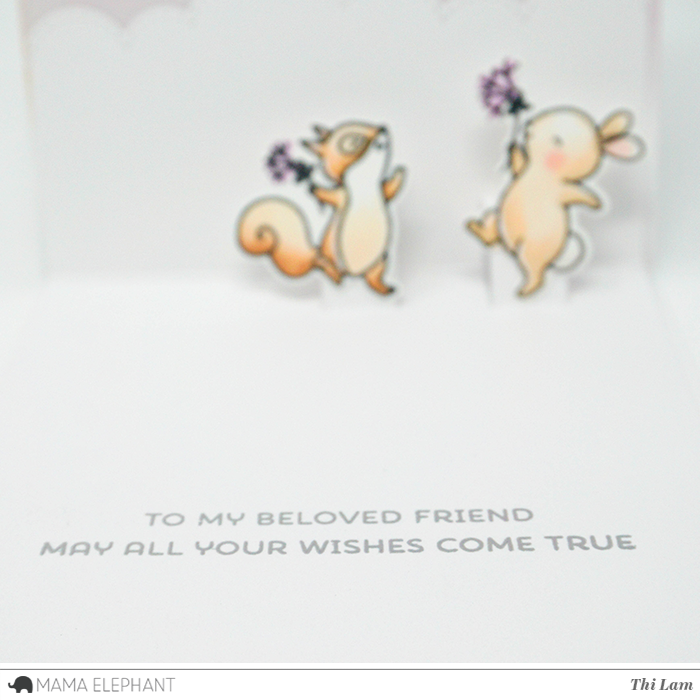
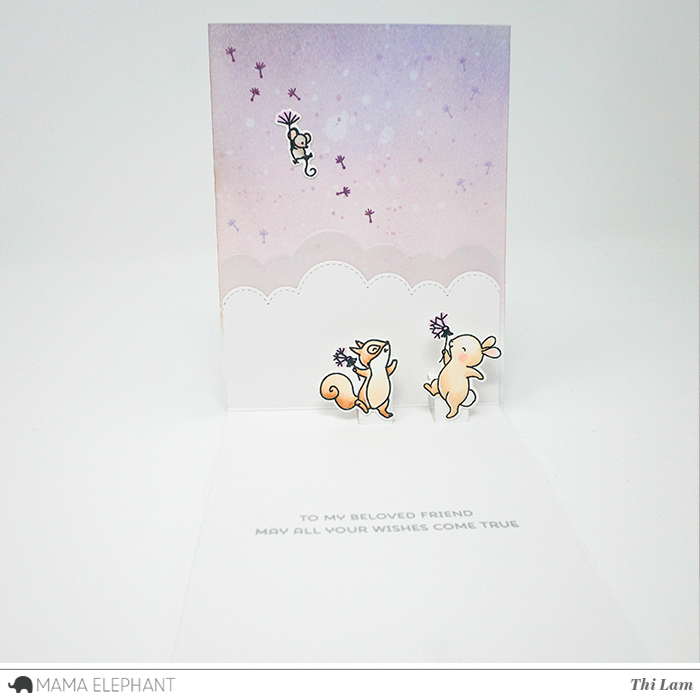
For the insides of the cards, pop ups were created by combining the new Book Buddy Creative Cuts Dies mix with the Inside Pop Bunny and Cat Dies. An additional sentiment from the Oh Happy Day Stamp Set was stamped with black ink inside the card.

MEDesignerSeries_BookBuddy_5

Much like the inside pop ups, matching bookmarks were created with the Book Buddy Creative Cuts Dies mix and Inside Pop Bunny and Cat Dies and assembled as shown in the video. These go together so fast and make fantastic party favors or little gifts! These critters are so adorable!

MEDesignerSeries_BookBuddy_5

Don't be afraid to mix and match the bunny and cat faces from the Inside Pop Bunny and Cat Creative Cuts Dies and use them with the Book Buddy bookmarks!

MEDesignerSeries_BookBuddy_5

To watch the creation of this shaker card from start to finish, click HERE or watch below:


Mama Elephant Supplies used for this project:

7.09.2018

Dandelion Wishes with Amy

Hello friends! Amy here, and I have a friendship card to share with you featuring the adorable Dandelion Wishes stamp set.


For my project today, I stepped out of my comfort zone and created an almost one- layer card colored with Prismacolor pencils. 

To begin, I stamped the images from Dandelion Wishes with brown ink (for a softer look) on Canson Mi -Teintes white paper using the masking technique. Masking is a technique where you cover a stamped image so that other images may be stamped over it. This allows the masked image to be in front of the second stamped image to create an illusion of depth. I also masked the images so I can ink blend the background. 


I first stamped the raccoon, squirrel, the two bunnies, the bee, the mouse on the Canson paper and on full adhesive post-its. Then, I cut out the stamped images from the post-it and covered the images stamped on Canson paper. After, I stamped the mushrooms and the dandelions on the Canson paper, placing the images behind the first stamped images. Next, I covered all the images with post-its and ink blended the background with Peacock Feathers and Peeled Paint Distress Oxides. To add some texture, I spritzed the background with water using a sprayer.

Once the paper dried, I stamped the sentiment and the floating seeds with the same brown ink. To darken some of the lines here and there, I used Copic Multiliner in Sepia and used white gel pen on their cheeks and the orange mushrooms.


When I was done coloring, I adhered the front panel to a top folding A2 sized note card.


That's it for today! I hope you enjoyed my project. Thank you so much for stopping by!

7.06.2018

Good Reads with Vera

Hi everyone, Vera here and today I have a birthday card featuring Good Reads set and Bookmark It - Creative Cuts.

As the birthday theme is about book lover, so I create bookmarks and insert it inside of the card.  

To begin, I prepared my card as shown in this picture below. First, I blended my based card using Distress Ink - ripe persimon then I cut with frame dies from Peek a frame - Creative Cuts. Then, I white heat embossed the sentiment from Good Reads set and Happy Birthday from Mini Messages set.

Next, I stamped the images from Book Worm on Bristol paper and colored them with Copics. Then I used the coordinating Book Worm Creative Cuts to die cut the images out and adhered them into my card and bookmarks.

Here is the front cover of the card
and here is the inside 

This was such a fun card and easy to make. I hope you enjoy my card and thank you so much for stopping by!

7.03.2018

Dandelion Wishes with Thi

Mama Elephant Designer Series 
Hello, crafty friend! Thi here and today I am sharing my pop-up card using the newly released Dandelion Wishes. I absolutely love this stamp set and decided to do a dreamy cloud card as my last project for June as a guest designer. Thank you so much for all the love. It's been a dream come true! But enough of the mushy, let's get started on this card. First, I stamped my images on white card stock and colored with Copic markers. I cut the images out with their coordinating dies and set them aside to work on the background and lots of die cutting. 

 
Next, I ink blended an A2 card front and the inside of my card with Distress Inks. I wanted to keep the card cohesive inside and out. I splashed some water droplets and added splatters with coordinating Distress Inks. I then set this aside to completely dry since I will be embossing and stamping on it later. Then, I whipped out my trusty die cutting machine and the On the Hills Creative Cuts to make some clouds in white card stock and vellum. For the inside, I wanted one continuous piece so I used the partial die cutting technique I've been seeing a lot of and the same cloud die from On the Hills Creative Cuts to cut a small piece that's slightly smaller than the card since this is my pop-up piece. Tip: Cutting this piece a little smaller (about 1/8 of an inch smaller on each side) makes the card fold much nicer. You can see what I mean in the next image. 

 
I used the Pop-Up Trio Creative Cuts and cut out two pop-up tabs on the fold of the inner piece since I wanted two of my images to pop up. At this point, I stamped my inside sentiment from Dandelion Wishes onto this piece with Versamark and heat embossed with silver embossing powder. I adhered a vellum cloud behind the fold and adhere the entire piece on the inside of the card. I added my two colored images with some wet glue and moved on to the front of the card while the glue dries. 

 
Now that the ink blended piece is dry, I heat embossed the "Make a Wish" sentiment from Scripty Bday (which coordinates perfectly with Dandelion Wishes) with silver embossing powder. I used a tape runner to adhere the clouds and popped up the critters with foam tape for dimension. 

 
Lastly, I finished the card with the small dandelion stamps in two purple inks. I still felt it needed a little more interest, so I die cut Lots of Stars Creative Cuts on some white glitter paper and that was all it needed. I adhere the stars with some glue and my card is completed. Pop-up cards are pretty simple but has a fun element of surprise for the recipient! I hope I inspired you to try making a pop-up card today! 

7.02.2018

Book Buddy and Book Mark It with Keeway

Hi there! Keeway here and today I have some adorable bookmarks and a matching card to share with you featuring the Book Buddy - Dog and Bear and Bookmark It Creative Cuts

 
To begin, I die cut all the pieces needed to assemble these adorable book buddies. You can mix and match the various pieces to create different dog and bear combos. Here, I created a panda, a brown bear, and a dog. Using a Q-tip, I gently added some pink ink to their cheeks to give them a little blush. 

 
Next, I used my sponge daubers to gently add some shading to add ink blending to the edges of the cuts to give it a little more dimension. After the blending was done, I began assembling my book buddies together with some liquid adhesive. I also added a glossy mark on their noses with a white gel pen. 

 
Super easy! Look how cute they look are peeking over the pages. Too adorable. As these would be great as gifts, I wanted to also create a simple card to go along with these bookmarks. So let's keep going! 

 
My idea is to create a sort of pocket for these book buddies to sit in the card. I started by creating a simple background by blending ink radially on a piece of bristol board. Then I die cut it out using the large cross-stitch border die from the Sew Fancy Creative Cuts. Then, I used the Bookmark It Creative Cuts to die cut a little stitched window for the book buddy to sit in. The size of this window was just enough width to fit these bookmarks. For a looser fit, you can also use any of the circle dies, such as the Basic Circles Creative Cuts

 
I heat embossed the sentiment 'Hi!' from the Tandem Extras stamp set in silver onto white card stock. I used the speech bubble die from the Bookmark It Creative Cuts to die cut the sentiment out. 

 
After I added my puppy book buddy into the card, I added foam tape around it on the backside to give it some room before adhering it to a white base card. I adhered the sentiment bubble beside him on the card with foam tape as well. 

 
The card is simple, yet sweet! 

 
From its profile you can see how it's snuggly sitting in the card. 

 
And I was able to switch it out with any of my other bookmarks as well. 

 
These book buddies also stand on its own on a flat surface really well too. Look how cute they line up. I'll definitely be placing one of these guys on my craft table to keep me company! I will be making more variations with these dies to share with friends for sure. This is the perfect little gift for book readers! Hope these projects filled you with lots of cute ideas. Thanks so much for stopping by!