
Hello! Mette Witus here today with the biggest project I’ve ever done – An advent calendar featuring the new Slim Peeking Presents and Oh Gnomie Tree.
I plan on using this to put little messages inside each flap – some just encouraging words others with clues as to where a little gift is hidden. That way the advent calendar becomes a daily activity with a bit of treasure hunting.

I started by cutting out the Slim Peeking Presents frame and panel eight times – These will be used to create the “pages” with the flaps on them. I also cut eight pieces of white cardstock to go on the back of each frame.
Before adding the frame to the backer piece, I needed to create hinges in between the pages – make sure not to make the hinges too tight, as they need to be able to fit a little bit of decoration on the pages. For this I used Tyvek – Basically tear resistant envelopes I cut down to thin strips and folded along the middle. I put together four backer pieces using these hinges and then added the frames to each of them to cover up the hinge. Don’t forget to add an extra hinge to one of the last pieces, as this will be needed to attach the center of the advent calendar. Repeat this for the other side.
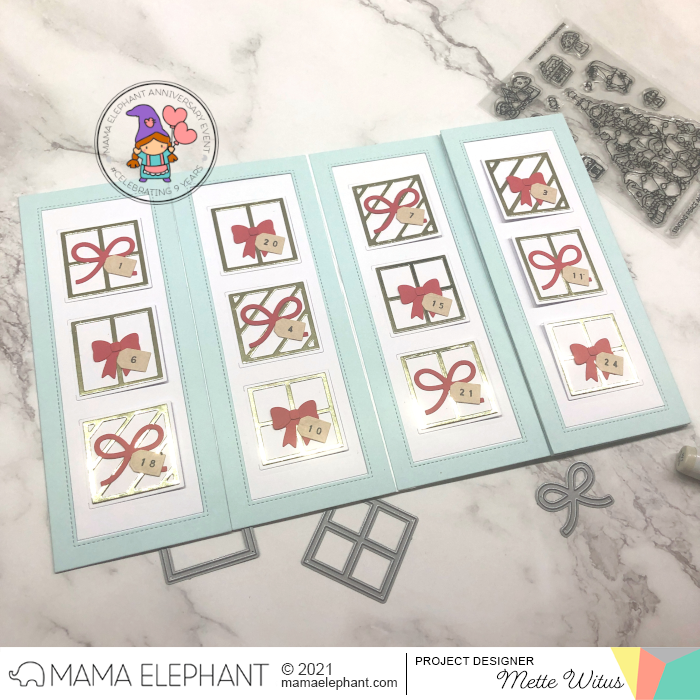
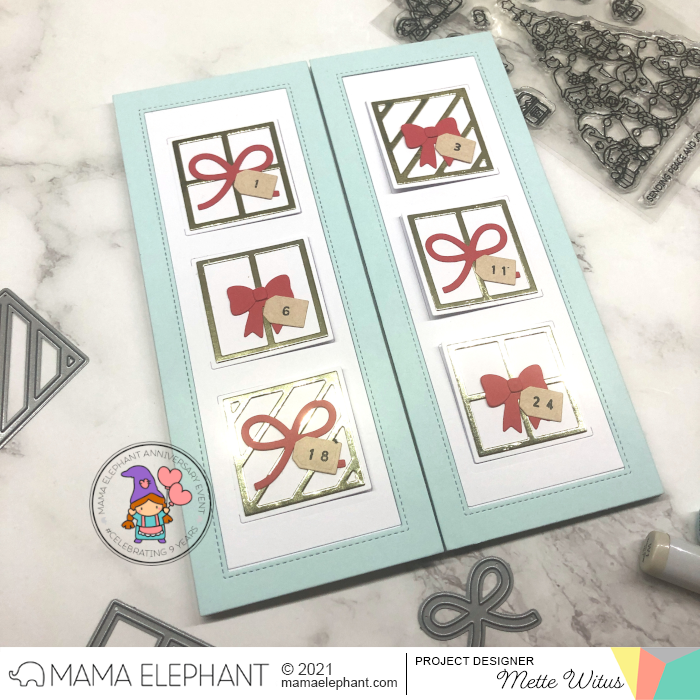
Then I added the flap pieces – making sure each of the 4 sections had them open in the same direction. For the left “pages” the opening is to the right and on the right “pages” the opening is to the left – so they all open towards the middle.

To decorate the flaps, I cut out a bunch of the gifts from gold cardstock and bows from red cardstock. I simply assembled these and put them in a random order.
For the numbering, I cut 25 of the smallest tag shape from Slim Peeking Presents and then used the numbers from Lots of Letters to stamp each number from 1-25. I mixed 1-24 up really well and then added them randomly to the gifts.
For the numbering, I cut 25 of the smallest tag shape from Slim Peeking Presents and then used the numbers from Lots of Letters to stamp each number from 1-25. I mixed 1-24 up really well and then added them randomly to the gifts.

With all the flap pages done, I lined them up together to measure how wide my center section needed to be, then cut it out twice from white cardstock. To add the flap pages to the center, I simply folded them up and laid them next to each other, face down. Then I could place the first center piece on to and glue down the hinges we left on the last “pages” before adding the last center piece on the back – both to hide the hinge, but also give the center piece a bit more stability.

To decorate the center piece I stamped the adorable gnome pile from Oh Gnomie Tree and colored it in. Then I cut it out using the matching die – which I also cut twice from white cardstock. Then I used some pieces of vellum to create two little hinges for the gnomes– as I will need this to be my 25th flap.
To create this, I glued the vellum hinges to the back of the colored pile of gnomes, and then put one of the white pieces behind it to hide the hinges and the coloring bleed through. Folding away the hinges, I placed the last white piece on the back of the others, then I folded the hinges back and glued them down to the back of the last white piece. This is the flap all done – now to decorate the background.
To create this, I glued the vellum hinges to the back of the colored pile of gnomes, and then put one of the white pieces behind it to hide the hinges and the coloring bleed through. Folding away the hinges, I placed the last white piece on the back of the others, then I folded the hinges back and glued them down to the back of the last white piece. This is the flap all done – now to decorate the background.

For the background, I cut down a piece of gold cardstock to fit my center piece – leaving the same white space around it as the Slim Peeking Presents frame adds to the flap pages. Then I cut a piece of white cardstock to fit inside that, leaving a small golden frame around it. Before gluing these together, I needed to stamp my background.
Since I knew I would be covering up the majority of it with the Gnomie Tree flap piece, I didn’t have to create more than one mask – for the trees.
I started the background off by stamping the Oh Gnomie Tree with a light colored ink at the bottom of the scene – this was simply to help place all the other things around it – and to know where I needed to color my scene to.
Having placed the gnomes, I could then add the trees from Scene Builder, mask them and then add the mountains from the same set.
For the sentiment I used the beautiful Merry Christmas from Merry Christmas Wishes and some red ink.
I colored all of this in and then added details using a white gel pen. Remember, you don’t need to color this Gnomie Tree, as we will glue the flap piece on top.
I glued down these center layers and added the Oh Gnomie Tree flap and of course the little tag with 25 on it.

Here you can see how all the flap pages are folded in.
Mama Elephant Supplies:
Oh Gnomie Tree Stamps & Dies
Slim Peeking Presents Creative Cuts
Merry Christmas Wishes Stamps
Lots of Letters Stamps
Scene Builder Stamps & Dies
Mama Elephant Supplies:
Oh Gnomie Tree Stamps & Dies
Slim Peeking Presents Creative Cuts
Merry Christmas Wishes Stamps
Lots of Letters Stamps
Scene Builder Stamps & Dies


No comments:
Post a Comment
Note: Only a member of this blog may post a comment.