
Hello, friends! Thi here with a shaker card featuring the adorable and magical Little Fairy Agenda paired with Offset Rainbow Creative Cuts.

First, I stamped and colored Little Fairy Agenda with Zig markers and die-cut them with their coordinating dies.
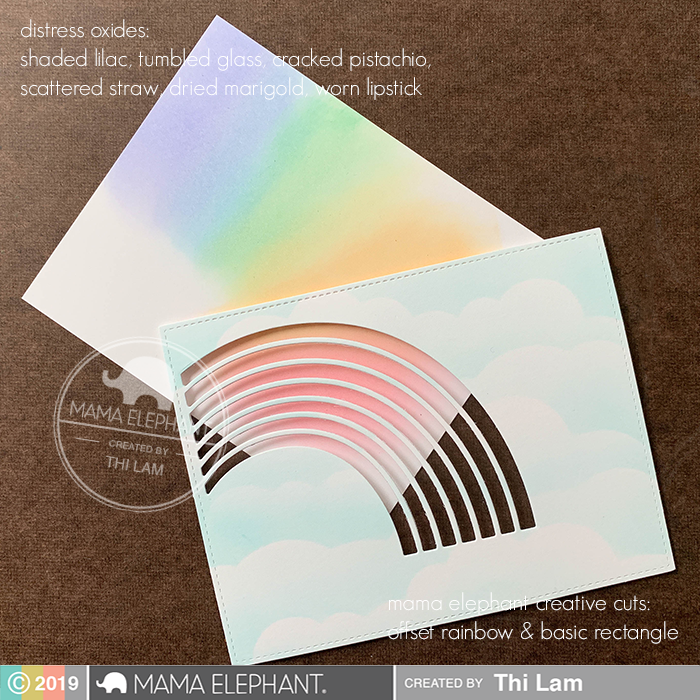
For the background, i cut out a few pieces of paper using the Basic Rectangles Creative Cuts. I ink blended on both please. For the front panel, I ink blended with a cloud stencil. For the shaker background, I ink blended with Distress Oxides for the back of the rainbow. I was inspired by Keeway's brilliant ink blending of Offset Rainbow. This way of coloring is quick yet gorgeous and really leans to making a card with a lot of impact but still relatively simple to do.
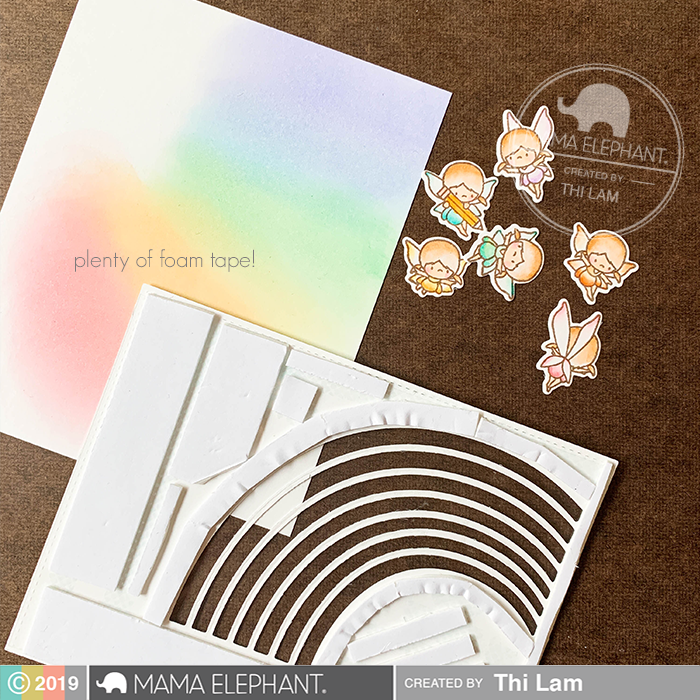
I prepared the back of my front panel by loading it with a lot of foam tape and built a well for the mini stars confetti I will be adding as my shaker bits. I trimmed down my rainbow background then peeled off the foam tape and adhered it by lining up the top left colors. And that's it - the shaker element is finished.
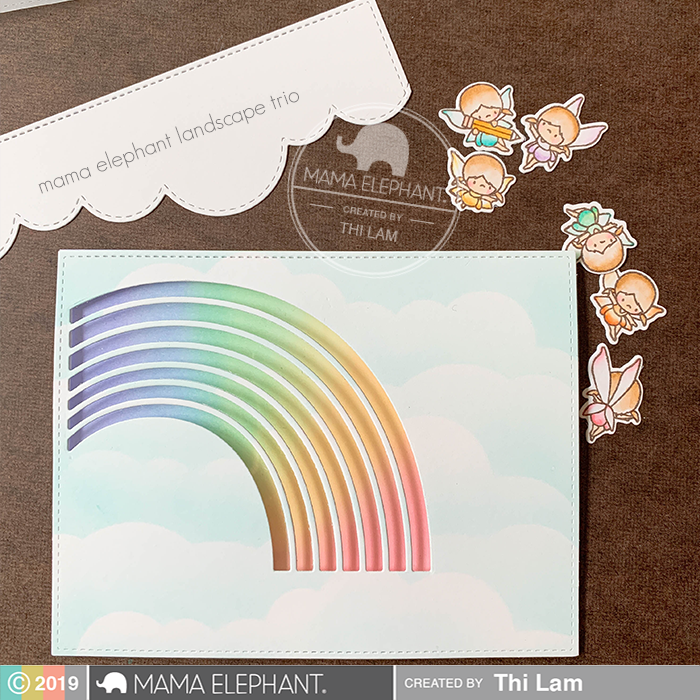
To complete the front of the card, I cut out a piece of vellum and one piece of card stock with the cloud die from Mama Elephant Landscape Trio. I embossed the sentiment from an old Stamptember exclusive set because it was just too perfect for this card. Then, I adhered the vellum cloud onto my base with tape runner (Tip: I only taped the bottom that is hidden behind the white cloud piece so that the adhesive does not show through the vellum.) Lastly, I mounted some foam tape on the white cloud with the sentiment on top of the vellum.
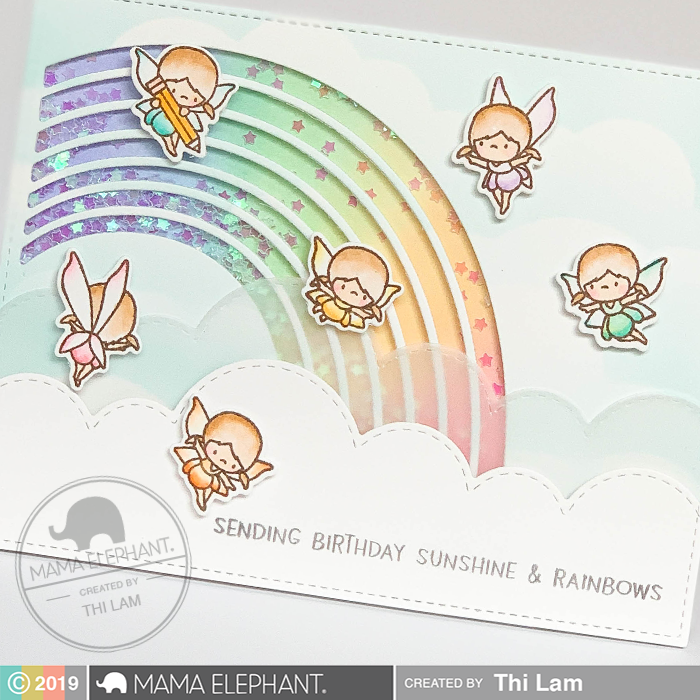
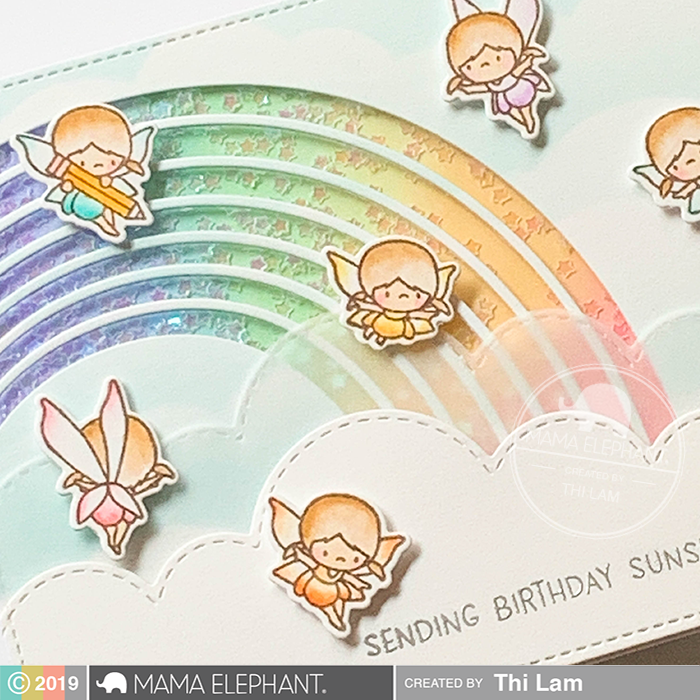
To finish my card, I adhered my colored little fairies onto the card and my shaker card is finished! I hope I inspired you to add a little shaker fun in your crafty adventures soon! Thanks for stopping by.
Mama Elephant Products I Used:
Little Fairy Agenda
Little Fairy Agenda Creative Cuts
Off Set Rainbow Creative Cuts
Basic Rectangles Creative Cuts
Landscape Trio Creative Cuts
Little Fairy Agenda
Little Fairy Agenda Creative Cuts
Off Set Rainbow Creative Cuts
Basic Rectangles Creative Cuts
Landscape Trio Creative Cuts


Wow… this is absolutely gorgeous!
ReplyDeleteThis is sooo beautiful and magical! :)
ReplyDeleteToo precious! Such an adorable card!
ReplyDeleteLove the adorable fairies and the fab rainbow die!
ReplyDelete