Image Map

9.30.2020

Slim Woodland with Amy

 Hi! Amy here sharing a fun shaker card for my September Designer Series project, featuring the Slim Woodland CC and Big Oh So Jolly CC.


To begin, I Copic colored the stamped images from the Snow Friends stamp set and die-cut them with the coordinating Snow Friends CC.

The background was trimmed and ink blended with Distress Oxides.

The front panel was die cut with the Slim Woodland CC. I glued on diamond dust around the snowdrifts and around the tops of the trees.

The sentiment was die-cut using the Big Oh So Jolly CC.

To assemble the shaker card, I adhered trimmed acetate behind the front panel and two layers of foam tape around the edges and the top snowdrift. Then, I added the diamond dust as the shaker element and adhered the background panel on top.

To finish, I adhered and foam mounted the colored images and the sentiment and added splatters of white ink to create snow.


ME Supplies:

Slim Woodland CC

Big Oh So Jolly CC

Snow Friends stamp set

Snow Friends CC

That's it for today. I hope you enjoyed my project! Thank you so much for stopping by!

9.29.2020

Toasty Friends with Thi

Hi! Thi here, and today I am sharing a card I made using Toasty Friends stamp set and Big Merry and Bright - Creative Cuts from the September 2020 release. I love these large sentiment dies from Mama Elephant whenever I want to make a quick yet impactful card. The images from Toasty Friends brought the exact amount of cute factor I need for an adorable holiday card!

So, let's begin! First, I stamped and colored all my images with watercolor markers. I then let it dry before die cutting with the coordinating dies.

For the background, I ink blended a piece of Bristol smooth card stock with Distress Oxide in Shabby Shutters and Abandon Coral. I wanted the card to have the traditional red and green of Christmas but by choosing more muted tones, you get an almost non-traditional look - which I love.

Once the ink blended piece was a little dry, I die cut the entire thing with DE - Confetti Cover - CC for an interesting and fun background. I adhered this piece onto a top-folding A2 card base with tape runner.

Next, for my sentiment, I die cut the Big Merry and Bright - Creative Cuts three times - two times on regular card stock and one time in gold glitter card stock. I stacked them and glued them together for dimension. Then, I glued this onto my card and put a book on top to keep it down and flat while the glue dries.

While my sentiment was being weighed down and the glue was drying, I added foam tape to all my colored images. Next, I arranged them onto my card and adhered them and my card is finished!

I hope you enjoyed reading about my project today and thank you so much for reading! Have an amazing day!

9.28.2020

Slim Woodland with Nichol

Hello friends! Nichol here today with a Slim Woodland card that I turned into a fall scene rather than a winter or Christmas scene! I love that the landscape can be turned into "grass" rather than "snow" and how the leaves from the Tree Branches Cover Creative Cuts Die are the perfect way to add falling leaves to the design!

ME_FallScenewithSlimWoodland_1

Images from the Sincerely Yours Stamp Set and Toasty Friends Stamp Set were stamped on Bristol Smooth Cardstock with a no line coloring ink and colored with the following Zig Clean Color Real Brush Markers:

  • Bunnies: Mid Brown, Beige, Light Beige, Pale Pink
  • Mouse: Dark Gray, Light Gray, Pale Pink
  • Bunny in Blue Jammies: Deep Blue, Blue Gray, Purple, Blender, Mustard, Mid Brown
  • Mama Bunny's Chair & Card: Peacock Blue, Persian Green, Blender, Deep Red, Pale Rose, Mustard, Mid Brown
  • Bunny in Striped Jammies: Deep Red, Pale Rose, Blender, Blue Gray, Mustard, Mid Brown
  • Bunny in Green Jammies: Mid Green, Olive Green, Dark Gray, Light Gray, Blue Gray, Mid Brown, Beige
  • Bunny with Mug: Peacock Blue, Persian Green, Deep Blue, Blue Gray, Deep Red, Pale Rose
  • Thought Bubble: Blue Gray, Blender

The images were die cut with the coordinating dies.


ME_FallScenewithSlimWoodland_1

The Slim Woodland was die cut from smooth white cardstock. The edges of the panel were masked off with post it tape and the landscape was inked with Crushed Olive and Forest Moss Distress Ink. The trees were inked with Gathered Twigs and Ground Espresso Distress Ink.

A 3 1/4" x 8 1/4" panel was inked with Peacock Feathers and Chipped Sapphire Distress Inks and splattered with Liquid Stardust for a "starry sky". The Slim Woodland was adhered over the sky.

Scraps of smooth white cardstock were inked with Mustard Seed, Rusty Hinge, Crushed Olive, and Aged Mahogany Distress Inks and then die cut with leaves dies from the Tree Branches Cover Creative Cuts Die. The leaves were glued to the trees and scattered along the landscape to create the fall scene.

The Sincerely Yours Stamp Set and Toasty Friends Stamp Set images were adhered to the scene as shown. The thought bubble was adhered with foam adhesive.


ME_FallScenewithSlimWoodland_1

Watch the video tutorial below or click HERE to watch in HD: 


Mama Elephant Supplies used for this project:

Sincerely Yours Stamp Set

Sincerely Yours Creative Cuts Dies

Toasty Friends Stamp Set

Toasty Friends Creative Cuts Dies

Slim Woodland Creative Cuts Die

Tree Branches Cover Creative Cuts Die

9.27.2020

STAMP HIGHLIGHT: Holiday Word Banners

 Welcome back for our last but not least, Stamp Highlight for this month's release! Today we are looking at the new Holiday Word Banners complete with creative cuts! Adorn these sentiments to send festive wishes!


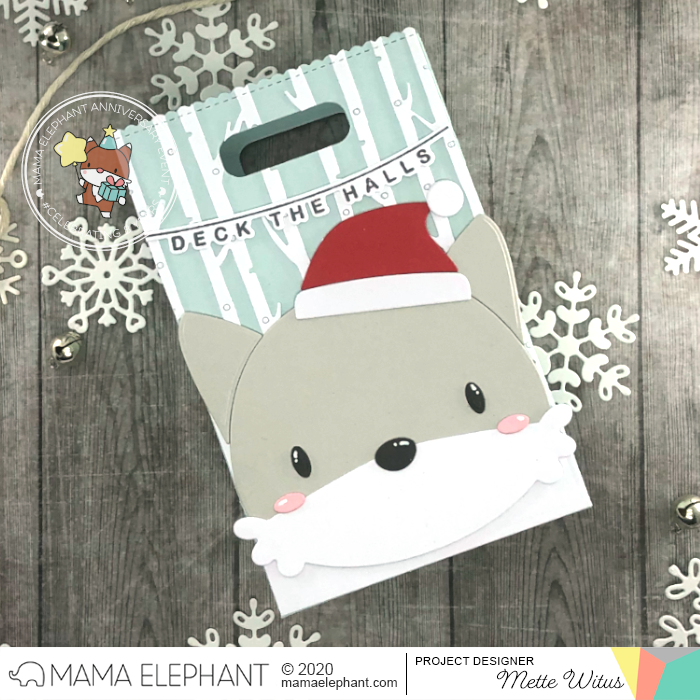
Mette used the Holiday Word Banners and the FBA - Fox to create these adorable Favor Bags. She used the FBA - Fox to make a red fox, and arctic fox and even a wolf!

Vera created this adorable winter scene by pairing the Holiday Word Banners with Snow Angels stamp set and Winter Forest Cover - Creative Cuts


We love Amy's card using the Holiday Word Banners along with the images from the Little Fox Agenda, Me and My Yeti, Let it Snow, and the creative cuts from the slim Card Basics and Landscape Trio.


Thi created this card by combining Holiday Word Banners with Let It Snow images. We love the way the banner is hanging between the birch trees.

9.26.2020

STAMP HIGHLIGHT: Best Gift Ever

 For today's Stamp Highlight we are bringing you the new Best Gift Ever stamp set! These sweet projects makes me wish I can be a kid again!


Keeway brought together all the kids for some fun holiday gift opening on her sweet card!


For this card, Vera paired the Best Gift Ever with the Big Merry and Bright - Creative Cuts and DE Night Sky Cover - Creative Cuts.

Sweet card by Amy using the Best Gift Ever and the frame die from the Frilly Window Frame Creative Cuts.


Mette combined the new Best Gift Ever with the tree from Cozy Christmas to create a christmas morning scene.


Thi created the sweetest holiday scene by combining Best Gift Ever with O' Tiny Tree. The frame from Pegworks - Creative Cuts and a sentiment from Mixed Holiday Greetings completes this adorable card.

9.25.2020

STAMP HIGHLIGHT: Toasty Friends

Welcome back for another day of adorableness with the new Toasty Friends stamp set! These images illustrated by Aida Zamora really makes you want to warm up with a hot mug of cocoa!


Jennifer paired the “Toasty Friends” images with the “Slim Window Dressing” Creative Cuts to create a sweet slimline card.


Maria has created a cozy fireplace scene with the "Toasty Friends" Stamp Set. Her blue white
striped tableware and a blue white checked rug from her home served as a model for this card.
Maria loves blue and white with a touch of red. This and her love for the American Country Style
are expressed in this adorable scene.


Mette used the Toasty Friends and Let It Snow stamps to create a cute forest scene.


Vera created this sweet card by combining the Toasty Friends and Little Snowman Agenda.


Adorable card by Amy using the Toasty Friends stamp set.

9.24.2020

STAMP HIGHLIGHT: Santa Baby

 We have another adorable one from Aida Zamora! Today we are highlighting the new Santa Baby stamp set! So many fun projects by the Design Team! Such a fun set to create cute Christmas scenes!

She combined the new Santa Baby Stamp Set with the previously released Santa's Sleigh Stamp Set for this fun project. Isn't that neat?!

Megan has created a fun Mega Flipper card to show Santa's journey from the North Pole to delivering packages on Christmas Eve night.

Keeway used the Mega Flipper Creative Cuts to tell a story with the Santa Baby stamp sets!


Santa made his journey into town to deliver the presents for someone who's been nice all year!


She also tucked in a gift card at the end of the flip mechanics for her recipient. How fun!


Maria has created a clean and simple slim line card with the 'Santa Baby' Stamp Set and the 'Slim Card Basics' Creative Cuts. For the Sentiment she combined the 'Merry Script' Creative Cuts and the word 'Christmas' from the 'Mixed Holiday Greetings' Stamp Set.


Mette used the Santa Baby stamps and Artist Mat Creative Cuts to create some fun Christmas tags. She even used one of them to create a card.


Vera paired the Santa Baby stamps, Foliage Frame and Fortune Envelope - Creative Cuts to create these cute mini cards.


Amy used the Santa Baby and the Toasty Friends stamp sets to create this sweet card.


Thi created this happy holiday card by pairing Santa Baby with Four Window Cover - Creative Cuts to create mini scenes. The sentiment from Mixed Holiday Greetings fit in one of the windows perfectly and look so pretty in our Apple pigment ink.

9.23.2020

STAMP HIGHLIGHT: Sincerely Yours

 Today's Stamp Highlight is with the new Aida Zamora's Sincerely Yours stamp set. These bunnies are totally sweet!


Amy created this sweet card using the Sincerely Yours and the Slim Window Dressing Creative Cuts.


Mette used the Sincerely Yours and Toasty Friends stamps to create a cute one layer scene.


Maria has created a very magical living room scene with the 'Sincerely yours' Stamp Set.
She designed the living room in her favorite colors blue and white with a touch of red and
of course with her beloved wall panelling.

The friendly mice are also part of the scene, two of the mice are from the 'My pet kitties' Stamp Set.
The Sentiment is from the 'Mixed Holiday Greetings' Stamp Set.


Vera created this cute scene by combining the Sincerely yours with the Santa Baby and Holiday Word Banners stamp sets.

9.22.2020

STAMP HIGHLIGHT: Oh Penguin Tree

 We have another Stamp Highlight for you today! The waddling penguins are stacking up to create a festive picture perfect image for the holidays in the new Oh Penguin Tree stamp set!


Adorable holiday card by Amy using the Oh Penguin Tree stamp set.


Jennifer created a festive winter cards using the wonderful "Oh Penguin Tree" Stamps Set.


Maria has created an almost monochromatic slim line card with the 'Oh Penguin Tree' Stamp Set.
She combined it with the Sentiment Die from the 'Let it Snow' set. Only one Christmas cap is flashing
in red. We love it!


Mette used the new Wishes and Family Script Creative Cuts and Holiday Messages to create the sentiment over the Oh Penguin Tree on this slim card.


Vera paired the Oh Penguin Tree with the Big-Oh so Jolly - Creative Cuts and Holiday Messages for the additional sentiment.