
Hello, friends! Thi here and today for my designer series project I ventured into a card I had in my head but was a little intimidated to do because I knew it would be more of a process than my usual designs. But, I did it and it was worth it!
I wanted to pair the Little Mermaiden Agenda with the Fish Tank CC somehow, but I also wanted to use a lot of the little mermaidens, so, I decided to create a full scene inside my card and do a peek a boo window using the Fish Tank CC. And...because I'm craaazzzy, I thought, why not make it a shaker too! So I did. Haha.

To start, I stamped my images in brown ink then colored with Copic markers and die cut them. (I love these mermaid images!)
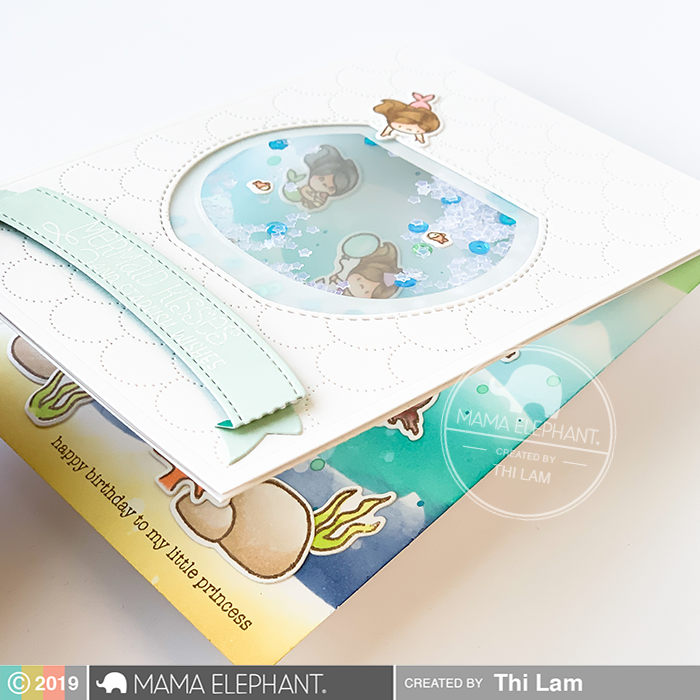
Next, I made my card base with Bristol smooth card stock since I knew I would be ink blending a background directly onto it. I taped my card base onto a board and ink blended using a Wave stencil I made out of watercolor paper by die cutting the Ocean Wave Trio - CC onto it. I used Distress Oxides in Cracked Pistachio, Tumbled Glass, Peacock Feathers and Chipped Sapphire. Then I splashed with water and added some paint splatters and let this dry while I worked on the shaker card front.
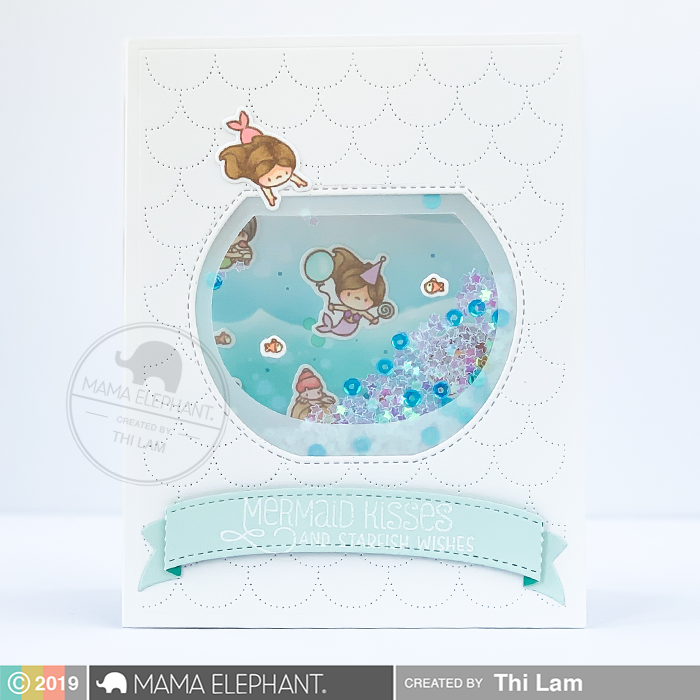
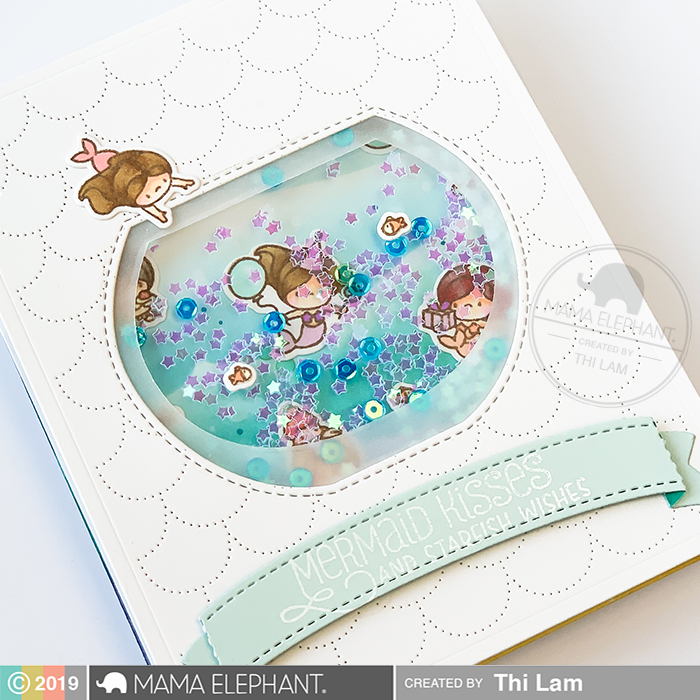
For the front panel, I die cut the Scales Cover onto white card stock. Next, I die cut the largest die from Fish Tank CC in the middle. Then, I used the smaller die and die cut it out of some vellum. This is going to add to the illusion of a fish bowl but give the card a little more interest. I glued this onto the back of the Scales Cover. Next, I glued acetate over these two layers. I then lined up my fish bowl onto my card based and used the larger die from Fish Tank CC and cut a window. I glued a piece of acetate to this side as well. I build a well onto the card base and filled it with mini stars and ocean colored mini sequins. I then adhered the card front onto the base by carefully lining up the windows.
Next, after my ink blended piece was dry, I added the sentiment inside from Birthday Messages. I adhered all my mermaids and a few scene building pieces from Mermaid Kisses to the ink blended background with tape runner.

To finish the front, I adhered one little mermaid to look like she's trying to jump into the party and two little clown fish directly onto the fish bowl. I heat embossed the sentiment from Mermaid Kisses onto the 3D Arch Banner - CC and put a piece of foam tape behind it and tape runner at the tails to adhere it to the front and my card is complete!

I'm honestly not the best photographer (I'm working on it) so I don't really think my pictures do this card any justice. I love it and will have to reserve it for a crafty friend who will appreciate the love and care I put into it!
I hope you like my project and thank you so much for stopping by!


Oh wowwww!! This is absolutely stunning! I love the shaker and the beautiful scene! <3
ReplyDeleteThis is fantastic! Your effort really paid off.
ReplyDeleteThis is WONDERFUL! LOVE that extra layer of vellum to help with the illusion of a fish bowl! AND the inside is BEAUTIFUL with all the layers of color you created with your home made stencil! WOW! AND I ALSO LOVE that little mermaid diving in on the front! A SUPER JOB for us! All your work DID PAY OFF!!! ;)A SUPER CARD Thi Lam!!!!!!!!!!!! <3
ReplyDeleteWow!!!! Fabulous card!!!!
ReplyDeleteAwesome shaker card!
ReplyDelete